Level Up Your Tech Skills: Free Web SSH Raspberry Pi Access
Imagine having the power to control your Raspberry Pi from anywhere in the world, all for free! Web SSH Raspberry Pi access isn't just a tech buzzword; it's a game-changer for hobbyists, developers, and tech enthusiasts alike. Whether you're tinkering with home automation or running complex server setups, this setup lets you access your Pi remotely without breaking the bank. So, buckle up because we're diving deep into the world of remote computing, and trust me, it's gonna be a wild ride.
Let's face it, technology can be intimidating, especially when you're dealing with terms like SSH and Raspberry Pi. But don't sweat it! This guide is designed to break down the barriers and make remote access feel like second nature. We're talking about setting up a secure web-based SSH connection that works like a charm, no matter where you are. Whether you're at home or chilling at a café, your Pi will be just a few clicks away.
Now, you might be wondering, why bother with all this? Well, the beauty of web SSH Raspberry Pi access is that it empowers you to manage your projects on the go. No more being tied down to a single location. Whether you're troubleshooting a server or tweaking your smart home setup, you'll have the freedom to do it all without paying a dime for premium services. Sound too good to be true? Keep reading, and we'll show you how it's done!
What Exactly is Web SSH Raspberry Pi Access?
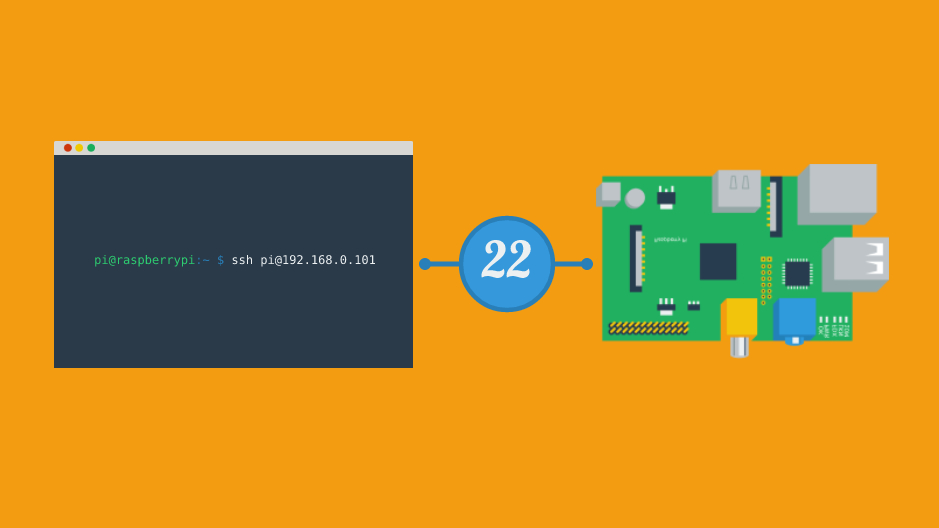
Alright, let's get one thing straight—SSH stands for Secure Shell, and it's basically your golden ticket to controlling a remote computer, like your Raspberry Pi, from another device. Web SSH takes this a step further by allowing you to access your Pi through a web browser. No fancy software downloads, no complicated setups—just open your browser, type in the address, and boom, you're connected.
Here's the kicker: most people think you need to pay for services like ngrok or paid hosting to make this happen. But guess what? You can set up web SSH Raspberry Pi access for free. All you need is a Pi, a bit of patience, and this guide to walk you through the process. It's like having a personal server at your fingertips without the hefty price tag.
Why Choose Free Web SSH for Raspberry Pi?
Let's break it down into simple terms. Free web SSH for Raspberry Pi is like having a superpower without the cape. You get all the benefits of remote access without the financial burden. Here's why it's worth your time:
- Cost-Effective: No hidden fees or subscription plans. Everything you need is already available on your Pi.
- Flexibility: Access your Pi from any device with a web browser. Whether it's your laptop, tablet, or even your smartphone, you're good to go.
- Security: With the right setup, you can ensure your connection is as safe as it gets, protecting your data and privacy.
- Learning Opportunity: Setting up web SSH is a fantastic way to dive deeper into the world of networking and remote computing.
And let's not forget the satisfaction of saying, "Yeah, I did that for free!" It's a win-win situation, my friend.
Understanding the Basics of Raspberry Pi
Before we dive headfirst into setting up web SSH, let's take a moment to appreciate the little powerhouse that is the Raspberry Pi. This tiny device has taken the tech world by storm, and for good reason. It's not just a computer; it's a gateway to endless possibilities.
For those who are new to the Pi scene, here's a quick rundown. The Raspberry Pi is a single-board computer that packs a surprising punch. It's perfect for hobbyists, educators, and developers who want to experiment with coding, automation, and more. Whether you're building a media center, a smart home hub, or even a retro gaming console, the Pi is up for the challenge.
Key Features of Raspberry Pi
What makes the Raspberry Pi so special? Let's break it down:
- Compact Size: It's small enough to fit in your pocket but powerful enough to handle serious tasks.
- Cost-Effective: Affordable pricing makes it accessible to everyone, from students to professionals.
- Versatile: With a wide range of operating systems and applications, the possibilities are endless.
- Community Support: A vibrant community of users and developers means you're never alone in your Pi journey.
Now that you know what the Pi is capable of, it's time to see how web SSH can unlock its full potential.
Setting Up Web SSH on Your Raspberry Pi
Ready to roll up your sleeves and get your hands dirty? Setting up web SSH on your Raspberry Pi is easier than you think. Follow these steps, and you'll be up and running in no time.
Step 1: Install SSH on Your Raspberry Pi
First things first, you need to make sure SSH is enabled on your Pi. Here's how you do it:
- Boot up your Raspberry Pi and log in to the desktop environment.
- Open the terminal by clicking on the terminal icon or pressing
Ctrl + Alt + T. - Type the following command and hit enter:
sudo raspi-config. - Use the arrow keys to navigate to "Interfacing Options" and press Enter.
- Select "SSH" and enable it by choosing "Yes."
- That's it! SSH is now enabled on your Pi.
Don't worry if it sounds complicated—it's actually pretty straightforward once you try it out.
Step 2: Install a Web SSH Client
Next, you'll need a web SSH client to access your Pi from a browser. One of the simplest options is AnyTerm. Here's how you install it:
- Head over to the AnyTerm GitHub page and follow the installation instructions.
- Once installed, configure it to work with your Pi's SSH settings.
- Test the connection by opening your browser and navigating to the specified address.
Voila! You've just set up web SSH access to your Raspberry Pi.
Security Best Practices for Web SSH Raspberry Pi
With great power comes great responsibility, and that applies to web SSH too. Security should always be at the forefront of your mind when setting up remote access. Here are a few tips to keep your Pi safe:
- Use Strong Passwords: Avoid using simple or easily guessable passwords. Mix it up with numbers, symbols, and uppercase letters.
- Enable Two-Factor Authentication: Add an extra layer of security by requiring a second form of verification.
- Keep Software Updated: Regularly update your Pi's operating system and any software you're using to ensure you have the latest security patches.
- Limit Access: Restrict SSH access to specific IP addresses if possible, reducing the risk of unauthorized access.
Remember, security isn't just a one-time setup—it's an ongoing process. Stay vigilant, and your Pi will remain safe from prying eyes.
Exploring the Benefits of Free Web SSH
Now that you've got your web SSH Raspberry Pi setup running smoothly, let's talk about the benefits. Here's why this setup is a game-changer:
Benefit 1: Remote Access Anywhere
Whether you're at home, work, or on vacation, you can access your Pi from anywhere with an internet connection. It's like having a portable server that follows you wherever you go.
Benefit 2: Cost-Effective Solution
Let's be real—tech can get expensive. With free web SSH, you're cutting out the middleman and saving yourself a pretty penny. No subscription fees, no hidden costs—just pure, unadulterated freedom.
Benefit 3: Learning and Growth
Setting up web SSH isn't just about the end result; it's also about the journey. You'll learn a ton about networking, security, and remote computing, skills that will serve you well in the tech world.
Common Challenges and How to Overcome Them
Let's face it—nothing in life is perfect, and setting up web SSH on your Raspberry Pi is no exception. Here are a few common challenges you might encounter and how to tackle them:
Challenge 1: Connectivity Issues
Solution: Make sure your Pi is connected to a stable internet connection. Check your router settings and ensure port forwarding is configured correctly.
Challenge 2: Security Concerns
Solution: Follow the security best practices outlined earlier. Use strong passwords, enable two-factor authentication, and keep your software updated.
Challenge 3: Configuration Problems
Solution: Double-check your SSH settings and ensure everything is configured correctly. If you're stuck, don't hesitate to reach out to the Raspberry Pi community for help.
Advanced Tips for Web SSH Raspberry Pi
Once you've mastered the basics, it's time to take your web SSH setup to the next level. Here are a few advanced tips to enhance your experience:
Tip 1: Automate Tasks with Cron Jobs
Use cron jobs to automate repetitive tasks on your Pi, making your life easier and more efficient.
Tip 2: Set Up a Personal Cloud
Turn your Pi into a personal cloud server, giving you even more control over your data and files.
Tip 3: Explore Containerization
Consider using Docker to run applications in isolated containers, improving security and flexibility.
Conclusion: Your Journey to Web SSH Mastery
And there you have it—a comprehensive guide to setting up free web SSH Raspberry Pi access. From understanding the basics to overcoming common challenges, you now have the tools and knowledge to take your Pi to the next level. Remember, the key to success is persistence and curiosity. Keep experimenting, keep learning, and most importantly, have fun!
So, what are you waiting for? Dive in, explore, and unlock the full potential of your Raspberry Pi. Don't forget to share your experiences and tips in the comments below. And hey, if you found this guide helpful, why not check out some of our other articles? There's always more to learn in the world of tech!
Table of Contents
- What Exactly is Web SSH Raspberry Pi Access?
- Why Choose Free Web SSH for Raspberry Pi?
- Understanding the Basics of Raspberry Pi
- Setting Up Web SSH on Your Raspberry Pi
- Security Best Practices for Web SSH Raspberry Pi
- Exploring the Benefits of Free Web SSH
- Common Challenges and How to Overcome Them
- Advanced Tips for Web SSH Raspberry Pi
- Conclusion: Your Journey to Web SSH Mastery

How to Connect via SSH to a Raspberry Pi Tony Teaches Tech
How to activate SSH on the Raspberry Pi. Howto Raspberry Pi

Using SSH on the Raspberry Pi Pi My Life Up
