Securely Connect Remote IoT P2P SSH Ubuntu Server: Your Ultimate Guide
So, listen up, folks. If you're diving headfirst into the world of IoT (Internet of Things), chances are you’ve come across the term "remote SSH connection" more than once. This isn’t just some buzzword—it’s a critical tool for managing your IoT devices securely. Whether you're a tech enthusiast or a seasoned professional, securely connecting your remote IoT devices using P2P SSH on an Ubuntu server is a game-changer. Let’s break it down for ya.
In this article, we’ll explore how to set up a secure SSH connection for your IoT devices on an Ubuntu server, step by step. We’ll cover everything from the basics of SSH to advanced configurations that ensure your data stays safe. If you’re worried about hackers or unauthorized access, don’t sweat it—we’ve got you covered.
But before we jump into the nitty-gritty, let’s address the elephant in the room: Why does this matter? Well, imagine this—your IoT devices are out there in the wild, collecting data and performing tasks. Without a secure connection, they’re like open doors for cybercriminals. SSH (Secure Shell) is your lock, and we’re about to teach you how to use it properly.
What is SSH and Why Should You Care?
Let’s start with the basics, shall we? SSH, or Secure Shell, is a cryptographic protocol designed to secure communications between two systems over an unsecured network. Think of it as a private tunnel where you can send commands, transfer files, and manage your IoT devices without worrying about prying eyes.
Now, why should you care about SSH? Simple. It’s not just about convenience; it’s about security. When you’re dealing with IoT devices, especially those that operate remotely, having a secure connection is non-negotiable. SSH encrypts all your communications, making it nearly impossible for hackers to intercept your data.
Here’s the kicker: SSH isn’t just for tech giants or big corporations. Even if you’re running a small home automation setup, SSH can protect your devices from unauthorized access. And when it comes to remote IoT devices, SSH is your best friend. So, buckle up, because we’re about to dive deep into the world of SSH and Ubuntu servers.
Setting Up an Ubuntu Server for IoT Devices
Alright, let’s get practical. To securely connect your remote IoT devices, you’ll need an Ubuntu server. Don’t worry if you’re new to this—it’s easier than it sounds. First things first, you’ll need to install Ubuntu on your server. If you’re not sure where to start, head over to the official Ubuntu website and grab the latest version. Pro tip: Stick with LTS (Long Term Support) releases for stability.
Once you’ve installed Ubuntu, it’s time to configure your server for IoT. Start by updating your system. Open a terminal and run the following commands:
sudo apt updatesudo apt upgrade
These commands will ensure your server is up to date with the latest security patches and software updates. Trust me, skipping this step is a recipe for disaster.
Installing SSH on Your Ubuntu Server
Now that your server is ready, it’s time to install SSH. By default, SSH isn’t installed on Ubuntu, so you’ll need to do it manually. Open your terminal and run the following command:
sudo apt install openssh-server
Once the installation is complete, check if SSH is running by typing:
sudo systemctl status ssh
If everything’s good, you should see a message indicating that SSH is active and running. Congrats, you’ve just taken the first step toward securing your IoT devices!
Configuring SSH for Enhanced Security
Installing SSH is one thing, but configuring it properly is another. By default, SSH uses port 22 for connections. While this works, it’s also a favorite target for hackers. So, let’s change the default port to something less predictable. Open the SSH configuration file by running:
sudo nano /etc/ssh/sshd_config
Find the line that says Port 22 and change it to a different number, like 2222. Save the file and restart SSH using:
sudo systemctl restart ssh
Next, disable password authentication and switch to key-based authentication. This adds an extra layer of security by requiring a private key to access your server. To generate a key pair, run:
ssh-keygen -t rsa -b 4096
Follow the prompts to create your keys, and then copy the public key to your server using:
ssh-copy-id username@server_ip
Finally, disable password authentication in the SSH config file by setting PasswordAuthentication no. Restart SSH, and you’re good to go!
Connecting IoT Devices via P2P SSH
Now that your server is secure, it’s time to connect your IoT devices. P2P (Peer-to-Peer) SSH allows your devices to communicate directly without relying on a centralized server. This reduces latency and improves efficiency, especially for remote devices.
Here’s how you can set it up:
- Install SSH on your IoT device (most modern IoT devices support SSH out of the box).
- Generate a key pair on your device and copy the public key to your Ubuntu server.
- Use an SSH client to establish a connection between your device and server.
For example, if you’re using a Raspberry Pi as your IoT device, you can connect to your server by running:
ssh username@server_ip -p 2222
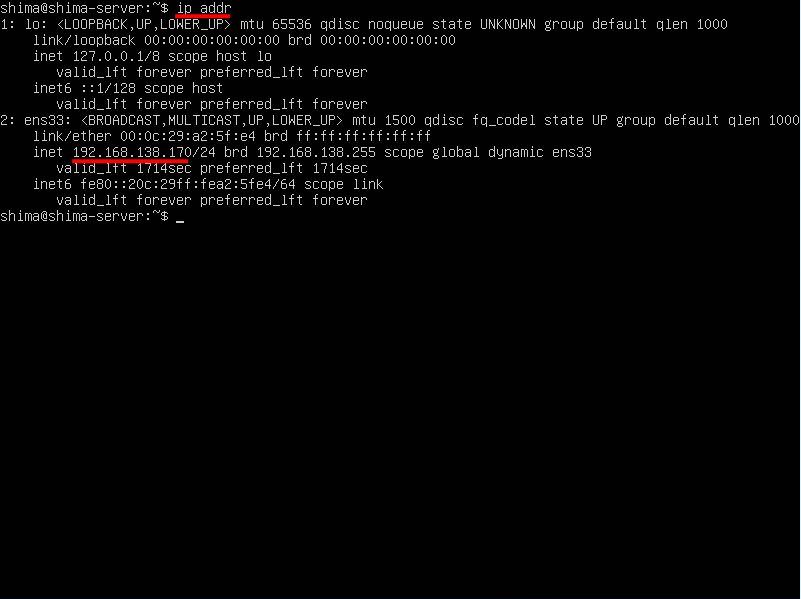
Replace username and server_ip with your actual credentials and server IP address.
Troubleshooting Common SSH Issues
Even with the best setup, things can go wrong. Here are some common SSH issues and how to fix them:
- Connection Refused: Check if SSH is running and ensure the port number matches your configuration.
- Permission Denied: Double-check your key permissions. They should be set to
600for private keys and700for the.sshdirectory. - Timeout Errors: Verify your firewall settings and ensure the necessary ports are open.
If none of these solutions work, try restarting your SSH service or checking your server logs for more details.
Best Practices for Securing Your IoT Devices
Securing your IoT devices goes beyond just SSH. Here are some best practices to keep your setup safe:
- Regularly update your server and devices to patch vulnerabilities.
- Use strong, unique passwords for all accounts.
- Monitor your server logs for suspicious activity.
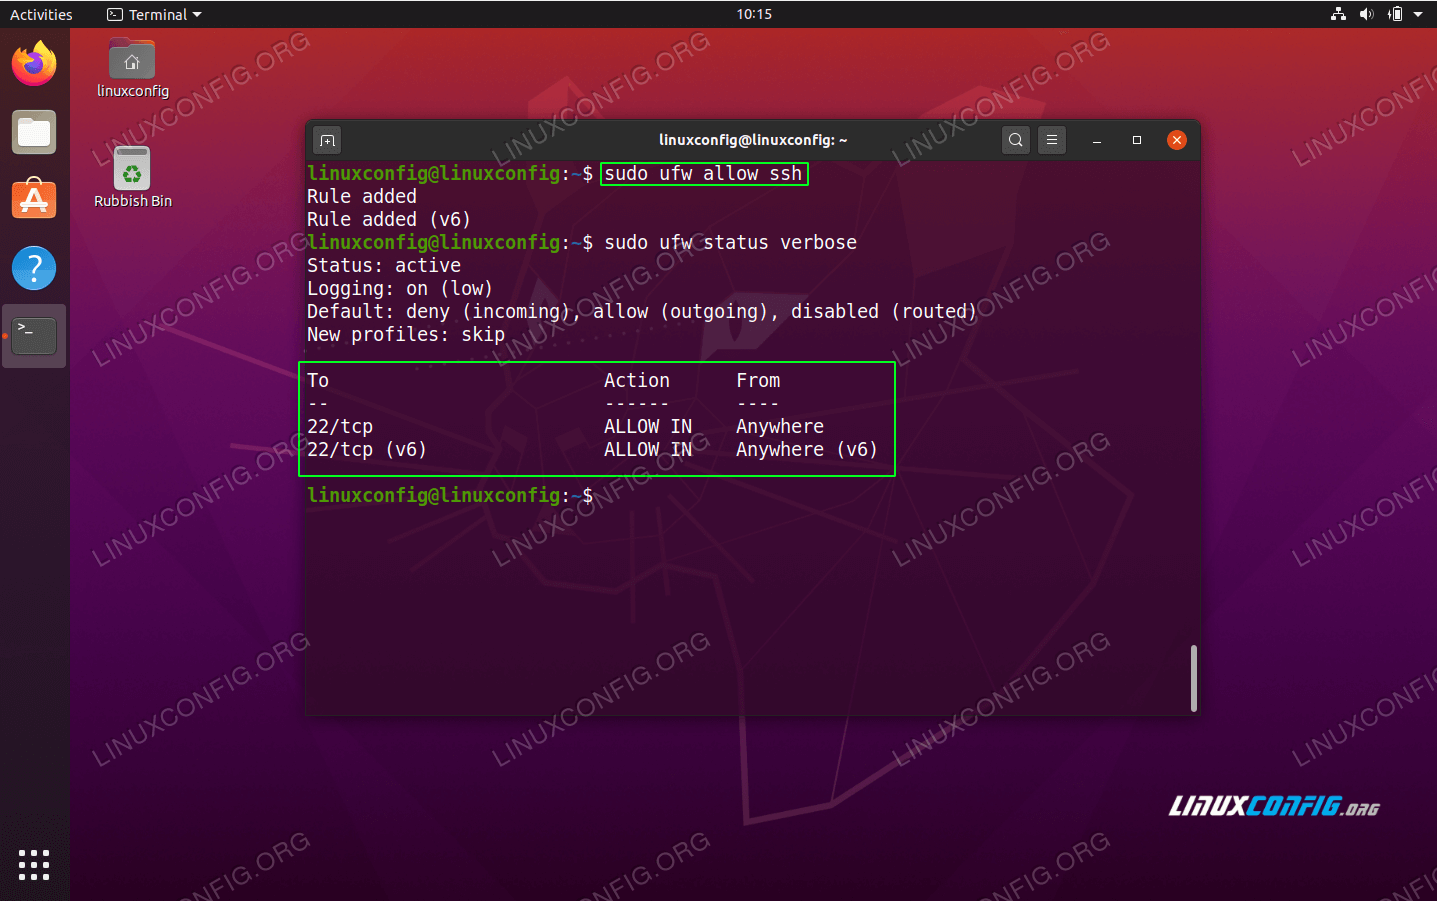
- Limit access to your server by using firewall rules and IP whitelisting.
Remember, security is a continuous process. Stay vigilant and don’t take shortcuts when it comes to protecting your data.
Advanced SSH Configurations for IoT
Ready to take your SSH setup to the next level? Here are a few advanced configurations to consider:
1. Two-Factor Authentication
Enable two-factor authentication (2FA) for an extra layer of security. Tools like Google Authenticator can generate one-time codes that you’ll need to enter in addition to your private key.
2. Port Knocking
Port knocking is a technique where you “knock” on a sequence of closed ports before SSH will accept connections. This makes it nearly impossible for attackers to find your SSH port.
3. Chroot Jail
Set up a chroot jail to restrict SSH users to a specific directory. This limits the damage if someone gains unauthorized access to your server.
Data Security and Privacy Considerations
When dealing with IoT devices, data security and privacy are paramount. Ensure that all data transmitted over SSH is encrypted and that sensitive information is stored securely. Regularly back up your data and test your backup procedures to ensure they work when needed.
Also, be mindful of compliance requirements. Depending on your industry, you may need to adhere to regulations like GDPR or HIPAA. Consult with a legal expert if you’re unsure about your obligations.
Conclusion: Secure Your IoT Future
There you have it, folks—a comprehensive guide to securely connecting your remote IoT devices using P2P SSH on an Ubuntu server. From setting up SSH to advanced configurations, we’ve covered everything you need to know to keep your data safe and your devices secure.
Now, it’s your turn to take action. If you found this article helpful, drop a comment below and share it with your friends. And if you’re hungry for more tech tips, check out our other articles. Stay safe, stay secure, and keep innovating!
Table of Contents
- What is SSH and Why Should You Care?
- Setting Up an Ubuntu Server for IoT Devices
- Installing SSH on Your Ubuntu Server
- Configuring SSH for Enhanced Security
- Connecting IoT Devices via P2P SSH
- Troubleshooting Common SSH Issues
- Best Practices for Securing Your IoT Devices
- Advanced SSH Configurations for IoT
- Data Security and Privacy Considerations
- Conclusion: Secure Your IoT Future
How To Use Ssh On Ubuntu Server

How To Use Ssh On Ubuntu Server
Ubuntu Server 20.04 LTS SSH Connection Procedure from Windows OS
